The Open Source Hardware data (OSHdata) organization has presented an interesting report on the current state of open hardware. The report presents statistics on different aspects of all the projects that have been certified. By February 2020 (date of the analysis) there were already more than 400 projects. Among others, the authors of the report include data on the commercialization of the projects, information on their creators or the licenses used. The full report is available on the report page of the OSHdata website. Below we present the most interesting ones.
One of the key aspects highlighted in the report is the commercialization of open hardware projects. Among more than 400 projects, almost 60% of them currently offer the products developed for sale. In addition, the average price of sale of the products is $211.47 being the price of more than half of them lower than $35. In this first price range you can find products such as sensors, 3D printed parts and USB accessories.

Fritzing is one of the best circuit design and documentation tools. It has a large component base and there are many community-created parts. Even so, sometimes we will not have available some of the ones we want to integrate in our projects. In these cases, creating our own custom parts for Fritzing allows us to add new components based on our own designs.
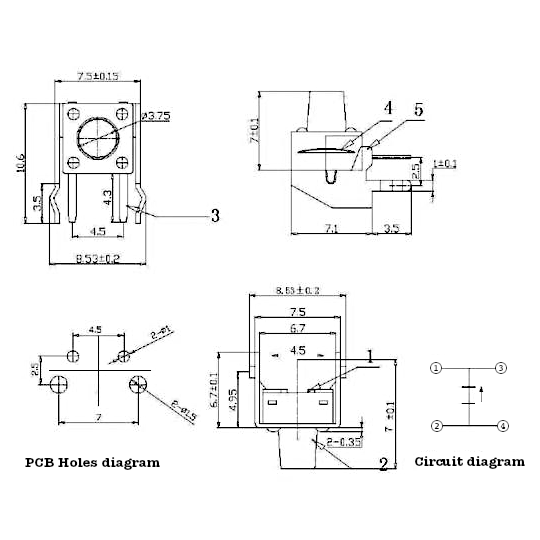
Right now I’m working on the design of the front version of Bike Pixel. During its design I used several new components such as vertical touch buttons. These are not available in the application and therefore I had to create my own components. Their diagram is shown in the following image:
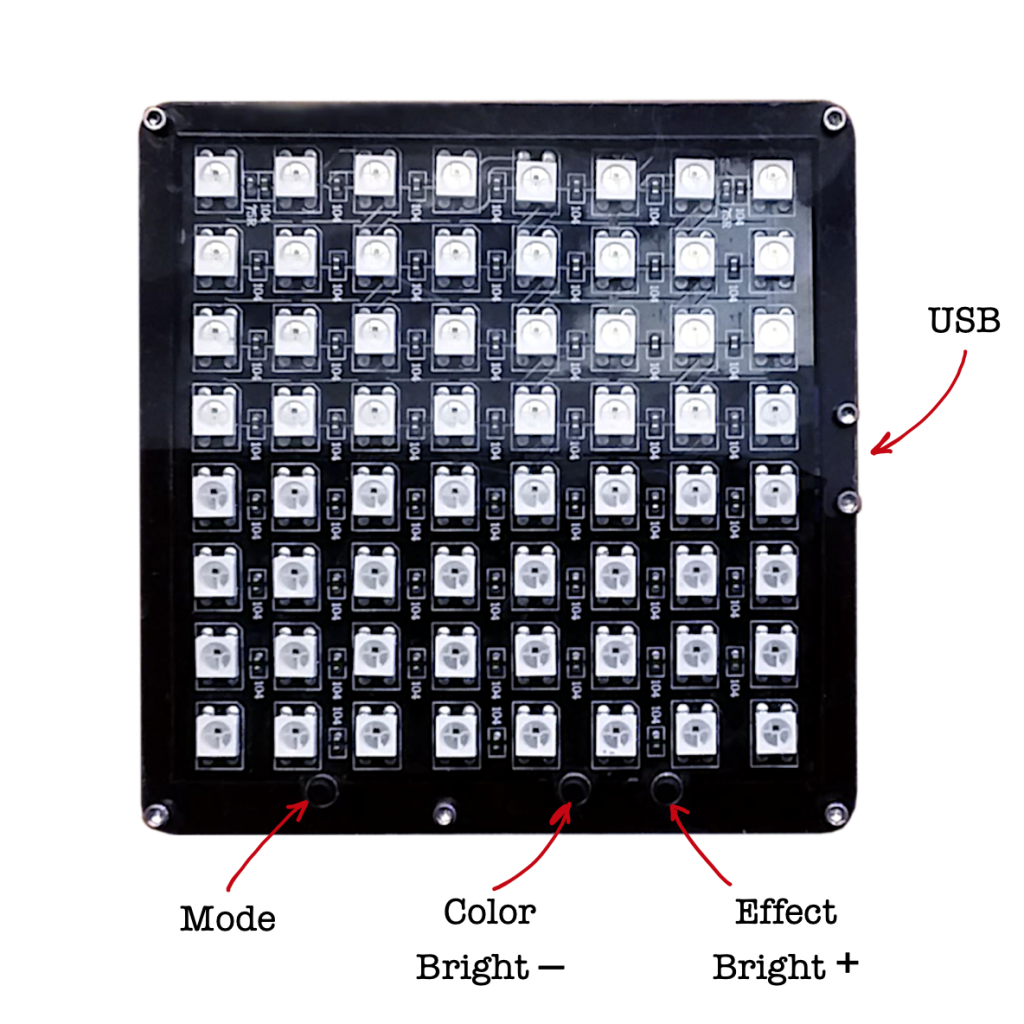
The first prototype of Bike Pixel has been ready for some time. Its use is very simple and only it is necessary plug it into a power bank to get it up and running. Even so, it would not hurt to present a small user manual and its main features. The Rear model includes a USB port and three buttons as shown in the following image:
In the next Bike Pixels version I want to integrate a rechargeable battery so you don’t have to rely on an external power source. In principle, this might seem trivial, but it’s not. Lithium-polymer batteries (or LiPo) are dangerous if they are incorrectly charged, overcharged, overheated or stored incorrectly they can explode. Luckily to make things easier for us and allow us to use a LiPo battery in our Arduino projects we have several modules that can do some of the work for us. One of these modules is the TP4056.
The main element of the module is the TP4056 chip itself. This chip is a programmable linear current and constant voltage charger for single cell LiPo batteries. The module also integrates two LED indicators of the state of charge and two additional chips in charge of the protection of the battery. Although there are versions of the module that do not have these chips, in this case we will use a version that does have these elements like the one described in the image.
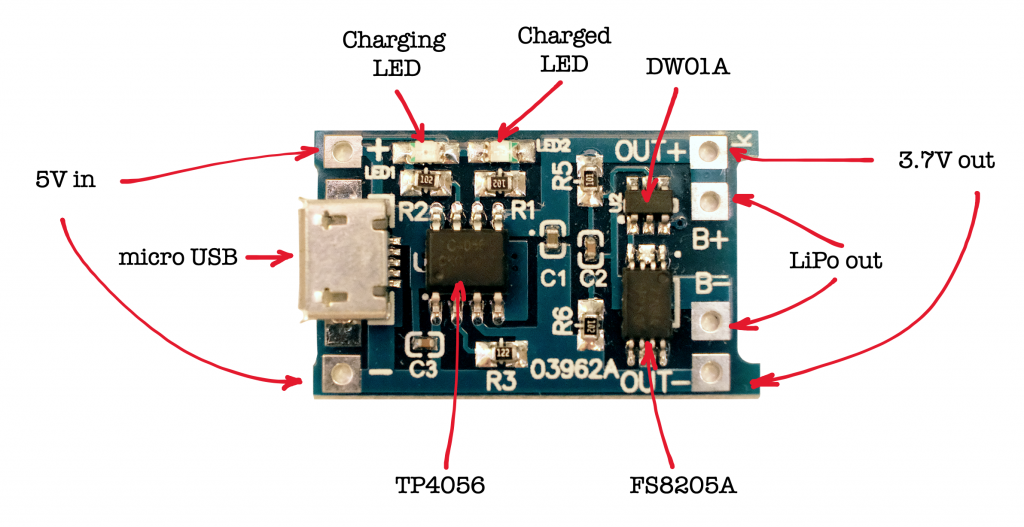
The module performs the charging process. First it ensures a constant current until the LiPo battery reaches 4.2V. Then, it gradually reduces the charging intensity until the battery is fully charged and ends the charging cycle when the charging current drops to one tenth of the programmed value. It supports input voltages up to 8V so it can be used directly connected to a USB port or a mobile charger up to 1.2A.
(more…)One of the first things we should do when we start a new Arduino project is to look for a free board. Then we have to disconnect what we had on the board to make room for the new development. Of course, the ideal would be to have a couple of dozen Arduino boards, but that would cost us a small fortune. Luckily we have the possibility of using Arduino clones although these have some advantages and disadvantages.

During the project I used both original plates and clones. In testing and developing the prototype, I used an original Arduino UNO board and a Nano. For the final assembly of the prototype I opted for a clone, directly soldering the connections and components over it. This choice was due to the fact that the original Nano plates include by default welded legs. In our case this was the first advantage of the clone board but can be also a disadvantage as the welded legs facilitates the connection with other elements and we can do without the welder.
(more…)Bike Pixel is now officially a project certified by the Open Source Hardware Association (OSHWA). The mission of this non-profit organization is to foster the creation of open source and free hardware. To this end, it annually organizes different events such as the Open Hardware Summit or the Open Hardware Month. Additionally, they issues its own Open Hardware certificate and maintains an archive with all certified projects.

The certification offered by OSHWA ensures that a given project publishes all its source files using open licenses. That guarantees that all the elements that compose a design can be used freely to recreate and modify the project.
(more…)Before we start building our Bike Pixel Rear prototype, we must have all the necessary components. The prototype version (or v0.x) is the one that requires the least number of elements and therefore is also easier and cheaper to assemble. Below I leave you the complete list of elements along with links to different online stores where you can buy the components:
| Component | Amazon.co.uk | AliExpress |
| Arduino Nano (Clone) | £5.99 | 1.76 € |
| 8×8 NeoPixels flexible matrix | £34.15 | 10.47 € |
| 3 x touch switches (6x6x8mm) | £2.95 (100 buttons) | 1.50 € (50 buttons) |
| 3 x 10 kΩ resistors | £1.59 (100 units) | 0.86 € (100 units) |
| 1 x 470 Ω resistor | £1.69 (50 units) | 0.86 € (100 units) |
| 9 x 1.6M 10 mm to 12 mm screws | £6.25 (100 units) | 1.56 € (50 units) |
| 4 x 1.6M 4 mm screws | £4.59 (50 units) | 1.53 € (100 units) |
| 13 x 1.6M nuts | £2.58 (100 units) | 1.46 € (10 units.) |
| 1m AWG 24 cable (0.51 mm) | £9.99 (5x9m) | 0.92 € (130 units) |
| 1 x 1000 uf/6.3V capacitator (optional) | £5.51 (20 units) | 1.68 € (50 units) |
| 1 x 6 AA battery holder (optional) | £2.69 | 2.15 € |
| 6 x rechargeable AA batteries (optional) | £9.99 (8 units) | 6.28 € (8 units) |
| 1 x on\off botton (optional) | £ | 0.75 € |
| 1 x 10000 mAh PowerBank (optional) | £ | 10.79 € |
After a few weeks of planing, coding, proofs and tries and retries I’m pleased to announce that the first prototype of the BikePixel Rear is ready to go.
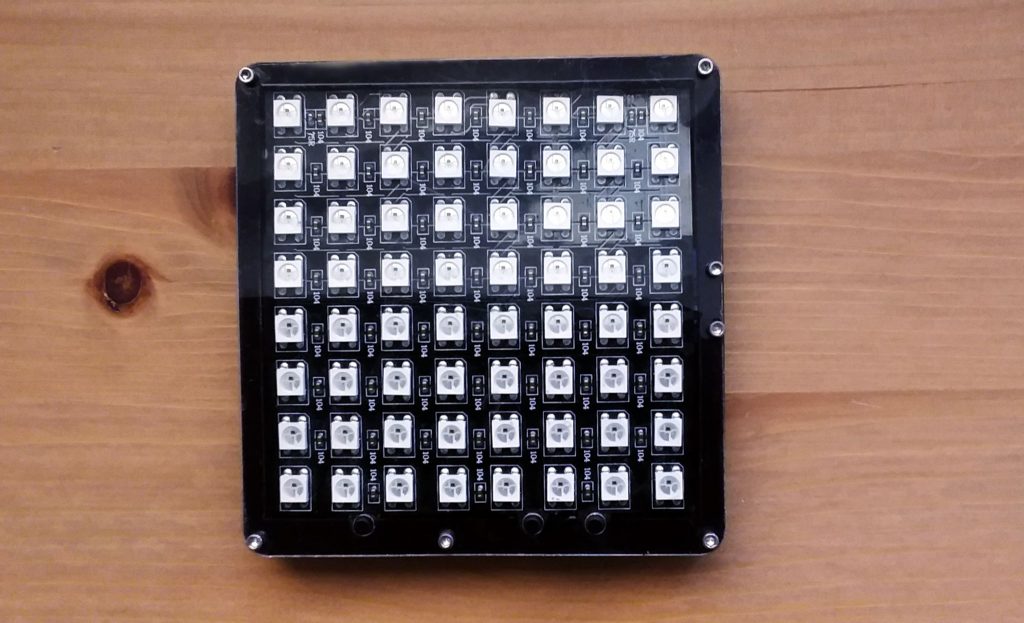
This version is based on Arduino Nano (actually a clone ;), our own PCB and a couple of other components (more information in the GitHub repository).
(more…)During the development of Bike Pixels we are using Frizing to design all sketches and PCBs. In some cases, like during the creation of our prototype of the BikePixels Rear, you may want to use a custom shape of a PCB instead of the default rectangular shape.
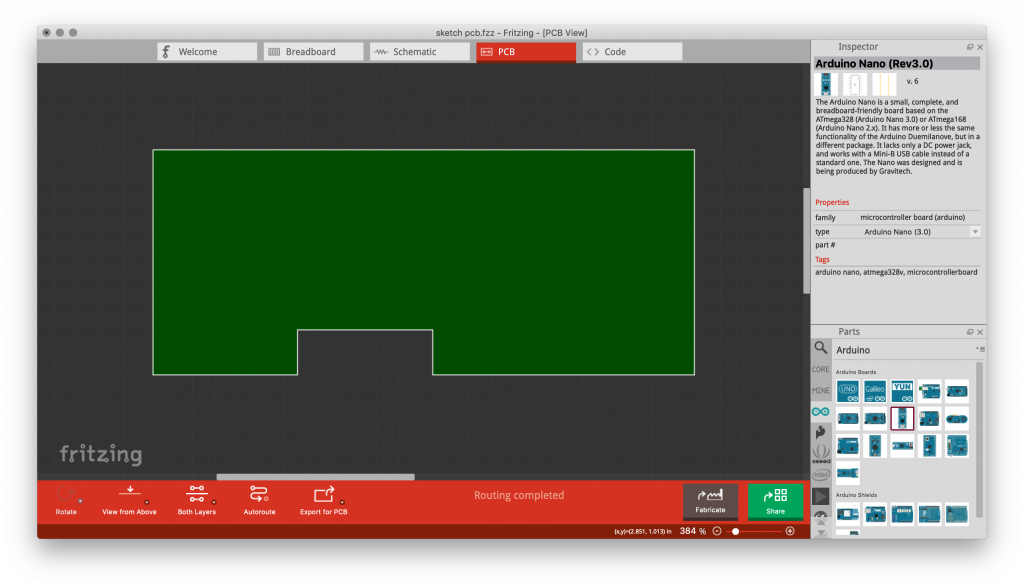
Fritzing enables to import custom designs of boards based on vector SVG images. Basically the process is divided into two main steps. First it is necessary to create your own board design in a vector drawing application like Inkscape or and after that you will want to import this design into Fritzing.
(more…)